Nov 4, 2010

Fall Royal Blog Tour

Welcome to my Castle! I hope your journey so far as been fun and you've enjoyed the wonderful treats the other Princesses have shown you.

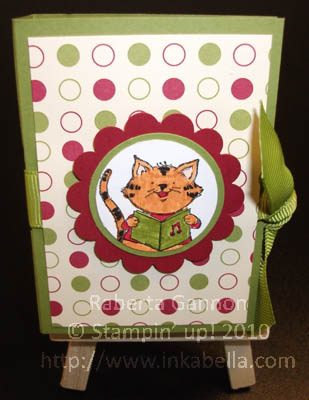
I have four projects I will be sharing with you, each using the set Merry Crittermas, which can be purchased from the Holiday Mini Catalog.


I thought long and hard about what kinds of things I wanted to make for you. I wanted them to be things that could be easy and quick to make. Thats when I thought, why not make small items that can be used as stocking stuffers, treats for co-workers, small gifts that your child can give to their teacher, etc.


The first project I have for you can fit all three of the categories. What I've made for you a small gift card which holds inside a lip balm!


This is versatile and the lip balm can be replaced with several things, such as lip gloss or a small pack of gum. Here is a view of the inside of the card:


The next project I created for you are these adorable triangle treat containers. Let your imagination have fun deciding what to place inside these.


The third project I came up with is a bookmark made out of a 4 inch silver paperclip. Super easy and fast to make.
Here is a close up view of each of the clips.


Do you like those bookmark-paperclips? Well then great because I'm giving them away as Blog Candy!! Just post a comment and be sure to leave me your email address to be entered into my giveaway. I will be randomly choosing a winner which I will annouce on this blog after the Tour! And I will ship overseas!


Please note, if you fail to leave your email address I cannot contact you if you win!


For those of you who feel uncomfortable with leaving an email address in a post, you can write your info like this: yourname at emailaccount dot com


I hope you've enjoyed your visit and the treats I've prepared for you. Please step back on the carriage and it will take you to the next castle on your trip. Safe Journey and please be sure to visit again!

Oct 25, 2010

MDS Mondays, #2

Hello Again

Its a new Monday and time for another MDS Monday's Sketch


To play along, just make a project using the provided sketch and upload it to your blog or online gallery. Then leave a link to your project using the widget at the bottom of this post.

If you upload it to an online gallery, could you please use the tag MDSM001 to make it easy to find?

I can't wait to see what you come up with!


To start, here is what I came up with! I made this card in My Digital Studio.


Oct 18, 2010

MDS Mondays

Hello again everyone, its another Monday!

In my previous "MDS Mondays" post, I stated the plan was to post a sketch every Monday. We'll, I think I was too optimistic about this taking off. I know that I've found my myself making more time, but well, this blog doesn't get much traffic (yet I hope :)) so I'm revising it to a new sketch every two weeks on Monday!


Once again, here is the sketch for MDS Monday #1.


To play along, just make a project using the provided sketch and upload it to your blog or online gallery. Then leave a link to your project using the widget at the bottom of this post.


If you upload it to an online gallery, could you please use the tag MDSM001 to make it easy to find?


I can't wait to see what you come up with!


And here is what I've come up with using this sketch!


The link for this MDS Monday has been closed.

Oct 13, 2010

New My Digital Studio Downloads!

I'm very excited to share that there are new downloads for My Digital Studio! These were released yesterday and are prefect for your Halloween and Thanksgiving projects!

Item Description Price
122174 Nite Owl Digital Kit $7.95
122175 Autumn Spice Digital Kit $9.95
122176 Deck the Halls Photocard Digital Kit $3.95
122177 Candy Cane Lane Photocard Digital Kit $3.95
123728 Celebrations Digital Kit $9.95
122166 Brad Add-On Pack $0.95

If you would like to view the complete list of My Digital Studio download offerings, from my Online Store > click on Shop Now > Digital Crafting > Newest Downloads.

Oct 11, 2010

MDS Mondays (#1)

I'm so excited to start MDS Mondays!

The plan is for me to provide you a sketch every week using My Digital Studio. Hopefully the sketch will inspire you. However, you are not restricted to using MDS to make your project - its up to you how you use it! You can create your project traditionally, or you can make it in MDS ... or using both ways create a hybrid!


Here it is! I decided to start with what is likely more of a scrapbook sketch.


To play along, just make a project using the provided sketch and upload it to your blog or online gallery. Then leave a link to your project using the widget at the bottom of this post.

If you upload it to an online gallery, could you please use the tag MDSM001 to make it easy to find?

I can't wait to see what you come up with!


And to hopefully get the inspiration going, here is my project!


The link for this MDS Monday has been closed.

Something New!

First, I must apologize for the month absence! It has been super busy for me, and I haven't been home very much. I've been working on some things (such as the Royal Blog Tour coming up!), but because I've not been home, my crafting time has severly suffered.

To that end, I've decided to try something new! I love My Digitial Studio and have been wanting to find a way to use it more. Therefore, I have decided that today beings MDS Mondays!!

Every Monday, I will share a sketch with you to use as you please. I'm setting up a Mister Linky account so that you can then share with me your great creation! I'm hoping that this will be a lot of fun and show the great versatility of My Digital Studio.

And to make it even more fun, you don't have to make your project in MDS, or you can make it a hybrid! Start your project in MDS, print it out and add finishing touches! My goal is to have some fun, get inspired and hopefully help inspire others!

All you'll have to do its create your project, post it to your blog, and then come back here to share the link to your post!

I'll be posting my first sketch shortly and I hope you'll participate.

Sep 13, 2010

The merge is nearly done

Previously I had a blog titled "Wonder Stamping". When I decided to give my business a name and register a domain, I decided to create a new blog-- Inkabella Designs.

I've just finished importing my posts from my previous blog, but now I need to go through them to insure the photos also imported. Please bear with me as I finish my conversion.

I did teach a very small class last night on how to make the quilted "rag bag" purses. We had a lot of fun and will be getting together again next weekend to work on another bag. I also taught how to make those cute fleece flower pins that have been showing up around the internet world a lot recently. I will post pictures tonight.

If you're in the Sacramento area and would like to get together for some stamping, I'm holding a workshop on Saturday, September 18th from 12:30 to 2:30 at the Round Table Pizza at 1307 Florin Road. The cost is $10 and we will be making 3 projects. I will share photos soon! They have an all you can eat buffet from 11:30 to 1:30 if you wish to show up a little early for lunch.

Hope to see you there! Happy Stamping! ♥

Sep 3, 2010

She's at it again!

Our list mom, Sherrill Graff, over at the Yahoo Group Late Night Stampers is at it again. She's offering another giveaway!


Thanks so much for visiting my blog today. Here is your chance to play along with our Late Night Stamper game.

my clue is : Beautiful Wings, Page 215
collect all 20 clues and turn your answers into to Sherrill Graff at istmpnv@aol.com

She will pick the winner to our $400 stampin up shopping spree soon, so hurry!
For more information, visit her blog at http://latenightstamper1.blogspot.com/

Enter today

Holiday Mini Share - Tags til Christmas

I was able to participate in a Christmas card swap and wanted to share with you all the card that I made.

I used the Tags til Christmas set from the new Holiday Mini (page 24). I used our Shimmer Paint in Platinum (Item #116807) and mixed it with some rubbing alcohol to make a shimmer paint spray. I then sprayed a sheet of whisper white cardstock. After it dried and the alcohol evaporated, I stamped the ornament image in Cherry Cobber. You can see some of the shimmer. I then used our Rhinestones (#119246) to add a little more sparkle.


Here is the list of items I used to make this card:

Stamp Set: Tags til Christmas
Ink: Cherry Cobbler (stamp pad), Old Olive (marker)
Card Stock: Cherry Cobbler, Old Olive, Confetti white, Whisper white
DSP: Brights--Patterns Designer Series Paper Stack
Assessories: Basic Rhinestones, Vintage Wallpaper Embossing Folder, Big Shot

I'm planning a Tags class coming up in the next couple weeks. If you would like to host a workshop and earn this set (or others) for free, contact me to set up a time thats best for you! I even offer one-on-one workshops if you want to just get together and stamp!


I hope you enjoyed this share! Please leave a comment and let me know what you think. I love hearing from you.

Happy Stamping! ♥ Raberta

Sep 1, 2010

New SU! Holiday Mini


Its September 1st and do you know what that means? It means its time for a new Holiday Mini from Stampin' Up!

From September 1st until January 3, 2011 Stampin' Up! has a lot of new wonderful products for you to enjoy!


To download a copy of the Mini in pdf, Click Here!

If you would like to download the Stampin' Supplies pdf, Click Here!

I hope you're just as excited as I am about the new Mini! Stay tuned for information on upcoming classes and projects using some of the great sets from the catalog!

Aug 30, 2010

Aug 16, 2010

Quilted "Rag Bag" Using SU Scallop Square

Its been a long time coming, but I finally made my very own "Rag Bag" using the Scallop Square and the Big Shot.

My grandmother passed away just over two and a half years ago. Before she passed away, she told my sister that should she pass on, she wanted me to have her sewing machine. I think that of everyone in our family, she felt I would be the one to put it to the best and most use.

Well, I'm sad to say that it sat in its box all this time. I thought about using it and designed some projects, but never got around to pulling it out and using it. Every time I thought about it, I thought of her and missed her all over again.

Well, last night a friend and I got to talking about different craft projects and ones we started but hadn't gotten around to doing. We both decided it was time to do it now, so we convinced each other to log off the computer and get to work!

It took me a half hour to get re-acquainted with the sewing machine, but I did and this is the result! I should also share that just because my grandmother knew I'd use it, I'm in no way a great seamstress. I actually know just enough to follow a really easy pattern, but I was able to figure out how to do this, so you can too!

Happy Stamping! (And sewing! ♥)

Aug 9, 2010

My first Workshop!

I held my first ever workshop on Sunday, August 8th. I prepared two projects, a card and a mini milk carton.

Everyone seemed to enjoy themselves and liked the projects, so I count it a success! I am planning another workshop for August 29th. I haven't fully decided on the projects yet, but I do plan to give some sneak peaks for the upcoming new holiday mini.

I wanted to design something that didn't use too many items and that would be easy for those who were new to stamping.

Items used for the card:
Stamp Sets - Awash with Flowers, Because I Care
Cardstock - So Saffron, Basic Black, Whisper White
Ink - Black, Daffodil Delight, Rose Red, Garden Green, Pretty in Pink
Ribbon - So Saffron (retired from SAB 2009)
Other Accessories - Scallop Border Punch

Mini Milk Carton:
Stamp Set - Tropical Party (Summer Mini Catalog)
Cardstock - Whisper White
DSP - Island Oasis (Summer Mini Catalog)
Ribbon - Hemp Twine
Other Accessories - Big Shot, Mini Milk Carton Diecut
Ink - Rose Red


Happy Stamping!