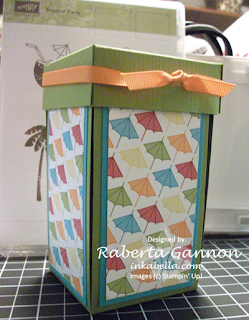
I'd like to share with you an exploding box I've done altered to fit a gift card!
 I got the idea for this box based on one that was offered in a magazine. The owner of a local scrapbooking store shared the idea with me and I did my best to recreate the box. The directions weren't very easy to follow, and some of the demonsions were very off!
So I took notes as I attempted to make my own version and will be posting a tutorial I've created so that you too can make this box, but without the bumps I hit. :)
 The sample in the magazine used bugs and such on strips of transparancy sheets. I attempted to duplicate this with flowers, but I was not entirely happy with the results.
You can see, based on the shadows from my pictures how some of the flowers kind of float. I may attempt this box again and try another approach with the transparancy strips to see if I can come up with something I'm happy with. For now, my tutorial will leave the decorating of the insides to you, but I will share the information from the magazine article in case you would like to try this for yourself. If you figure it out, I'd love it if you shared. :)

I decided to use this box for my cousin's upcoming 18th birthday, after completing this adorable box, I stepped away for a few minutes to call my sister to discuss plans for the party.
When I returned, one of my kitties decided to leave his own mark on the box. I guess he wanted to leave his own birthday wish. :) Thankfully he gnawed in such a way that I was able to fix the tips and my cousin loved the box.
This box used the Tropical Party and Island Oasis DSP from the Summer mini Catalog. The Summer Mini is good through August 31st so head on over to my online shop and order yours today!
I hope you enjoyed this share! Please be sure to check back soon for the tutorial to make your own Gift Card Exploding Box!
~Raberta Gannon
Sacramento, CA
